Wednesday, March 23, 2011

Kitchen Takes Shape

Before: Loose Bricks
It's been just over a month since the work started on the house. The very first day involved ripping out the old appliances and general demo in the kitchen. Since then most of the efforts have been on getting the upstairs ready and some of the other larger projects. We've finally made a bit of progress getting the kitchen ready to roll.

One of the trial and error projects was fixing the loose bricks in the kitchen. The brick is a thin paver probably about an inch thick. They were laid down directly over the plywood subfloor with mortar. Needless to say the plywood flexes and the bricks don't so several were popped loose. The guys had to pop them out, clean out the hole, and then reattach them using mastic which will hopefully be a bit more flexible than the mortar.
Before: Broken Window
Before: Upper Cabinet Gone
   Next up was patching some serious holes in the wall and prepping to paint over the khaki brown color. While the color was ok, there were many bad spots where the wall was cracked, dinged or otherwise damaged. we decided that if were were going to have to patch and paint anyway we might as well make a color change. The guys pulled down the upper cabinet unit so we could check out the situation with the backsplash. Sadly it was in rough shape as I had predicted. Whenever they did the last renovation they just busted up the wall to run the electric. To make the upper cabinet sit back flush to the wall they busted out the to bullnose tile. It would be a huge deal to have to repair, so we'll end up covering it over somehow.

AFTER: Coming together!
The new counter tops were installed this past week, so we finally have a sense of what it will look like all put back together. The new paint color is up, new window is in, and new pendant lights are hung. All that's left is to install the new backsplashes, reattach the upper cabinet, and install the appliances. We may actually have a kitchen by the time we move it!


Sunday, March 20, 2011

Stormy Weather

The water has finally gone down after near record rainfall a week ago. Things are mostly back to normal, but I thought I'd post a few snapshots of the basement during the "great flood" of March 2011. Here's hoping this isn't a regular event!


Water pours in at the bottom of the wall like a garden hose going full speed. It runs across the floor and into a little depression in the floor where there's a pipe through to the back room... Now we know what that pipe is for!

It comes through the wall here and joins the other stream in the channel along the wall. When we first looked at the basement I couldn't really figure out why there was a concrete trench randomly cut in along the one wall. It all make sense now!
Final destination is the pit of the sump pump. At the peak of the flooding the pump ran nearly continuously.
In the rest of the big room water just seems to bubble up and pour in from just about everywhere. Don't think we'll be storing anything of value down here any time soon!

Wednesday, March 9, 2011

Tore Up From The Floor Up

One of the first projects tackled by the contractors (aka Jason's dad's crew) was the bathroom flooring. Both bathrooms upstairs were in desperate need of new floors after water damage over many years had wreaked havoc with the sub floors.

The Original Flooring
The original floors in the main bathroom were a nasty speckled linoleum tile. When the guys pulled it out we discovered that it had been put down over what would have been nice hardwood floors at one point. unfortunately at some point they'd ripped out sections to run new wires or piping or something.

New Floors Prior to Grouting
When the white stick on vinyl molding visible in the photo to the left was pulled up it revealed a big hole where the floor had actually just rotted away over time as water splashed out of the bathtub. Strips of self-sticking molding were the perfect fix????? Right!

Since a complete gut job of the bathroom was out of the question, we decided that we would work with what we had and go with a floor tile option that would both complement the existing color scheme as well as tie in a bit of a historic feel.

The flooring in the baster bath was just nasty plywood sub-flooring since the master at one time had actually been carpeted. Yes... carpeted. Sadly I don't have "before" pictures of the floor in there. (Not missing much!) in that space we decided that since it is so tiny we wanted to so something unexpected and a bit fun. We found some really cheap porcelain tiles with a neat copper and blue glaze which in a large area might be a bit too much, but in such a tiny space really sets things off.

Master Bath tile job in progress. (Yes it really is that small!)

Sunday, March 6, 2011

Rest For The Weary

I just realized that somehow two weeks have already gone by without an update on progress. While it has been a bit slower that I may have liked, there are definitely signs of progress. After the initial clean up it was time to lay out a game plan to tackle the rest of the project. What's that old saying about eating the elephant??

With so many things clamoring for attention I decided that the first priority for me would be to tackle the master bath and two upstairs bedrooms that will be getting new flooring installed. It obviously made the most sense to the walls taken care of before the brand new bamboo flooring goes in. Especially since doing so meant HOURS of scraping, patching, sanding, caulking, and finally painting. First up was the master bedroom.

This is what we started with... a plethora of peeling purple pansies... (Try saying that 10 times fast). They gave the room a distinctively grandmotherly feeling and therefore they HAD to go. 

The first step of course was the removal of the wall paper, which in this case ended up not being such a big deal. Everything came down fairly easily. There were only a few areas that gave me some trouble. Basically at some point sections of the paper must have started peeling away from the wall and so someone used some sort of mystery glue to attempt to re-adhere the paper to the wall. I scraped and sanded and scraped and sanded, and absolutely nothing would get rid of the glue lines. In the end I had to just do a thin skim coat of patching plaster over the affected areas and feather that out so that it wasn't all that noticeable. Luckily most of those areas are WAY up high on the wall, and I doubt that they'll be too noticeable once everything else is finished  up.

Here are a few shots of the progression from last weekend:

< Walls striped and sanded


Walls primed >


Walls Base Coated
We're planning on a faux finish for this room, so there's one more LABOR INTENSIVE coat to go... but it should look pretty good once things are finished up. Once I get the master bath and the guest room painted I'll be back over here to do the trim. I figured that's something I can safely do after the floors go in if I need to.

Sunday, February 20, 2011

Top Down Approach

The Attic
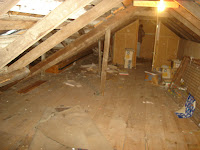
Being out of town a large portion of this last week meant things got off to a relatively slow start. Jason had a family funeral on Saturday and had other responsibilities on Sunday, so that left me to tackle things on my own. I decided to take a decidedly top-down approach and work on cleaning out the attic. Jason had started by clearing out the basement and I figured if I started in the attic we'd meet half way at some point in the next year or two.
The Basement

 There was WAY less junk left behind in the attic, so I figured that I had perhaps gotten the better deal. Jason definitely had some serious lifting to do due to the ton of moldy damp books piled up in all corners down there along with a 2" layer of ash and dust covering everything.... How bad could the attic actually be????
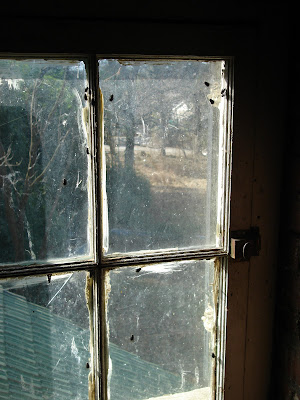
As you can see, it was a pretty bright and sunny day outside... The first thing that I discovered was that the attic is currently home to an EXTREMELY successful breading program for the common housefly. You can see just a few dozen of them if you look closely at the window to the left.... Those suckers are pretty resilient. I sucked them all up with the shop vac, and an hour later when I opened up the canister to dump it out they all flew right out. Scary!
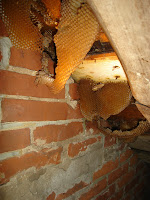
Flies were just the beginning... I've been telling Jason that one of my long-term dreams for the new house is to have some bees so we can have some fresh honey... I was pretty much figuring on that happening somewhere out in the yard, but apparently the bee's had a different idea... In the gable next to the chimney we found three VERY large honey combs and evidence of honey having dripped out all over the attic floor below. How we missed this on earlier trips up there I'm not sure... Luckily they look as though they've been abandoned for a long time. Not a bee in sight! Nor a raccoon, although there was pleanty of evidence of them too!
The pictures above are of a couple of different nest of the little beasts. Again, nothing looking too fresh, but a MESS to clean up none the less. The nest on the right was filled with sparkly things like Christmas tree ornaments and even a perfectly intact hand painted china tea cup!

It also appears as though  the house may have some significant historical connection to the Underground Railroad... for squirrels. The shot at right is a tunnel that they appear to have chewed through the insulation that runs the entire length of the attic under the floorboards (the lighter boards at the top of the photo). While I'm glad to think that the house may have played a key role the effort, I'm a bit sad to say that it certainly smells like not every beast who attempted to make the trip made it out alive... Hard to tell at the moment, but we'll have to see once the weather warms... Something smells decidedly un-fresh in the general vicinity.


2-11-11

A big date for us! After almost 5 months of work we finally closed on what will hopefully be the last house we ever buy. (At least for the next 30 years or so.) And now the fun begins!

The house was built in 1840's (parts of it anyway!). A stately home for sure, it's fallen into significant disrepair over the past several years. It's one GIANT fix-up project. Situated on almost 2.5 creek-side acres just 5 minutes from down town, it's pretty much the ideal location for us. 

There's so much to do that Jason and I thought that it would probably be a good idea to keep track of progress with a blog, so anyone interested could stay up with the latest and greatest goings on.

We have Jason's dad's crew doing the "heavy lifting" on some of the major projects that the bank is requiring us to take care of right away and Jason and I are tackling everything else as best we can! First up bathrooms, kitchen, and the master. STAY TUNED!